Carbide cold heading die
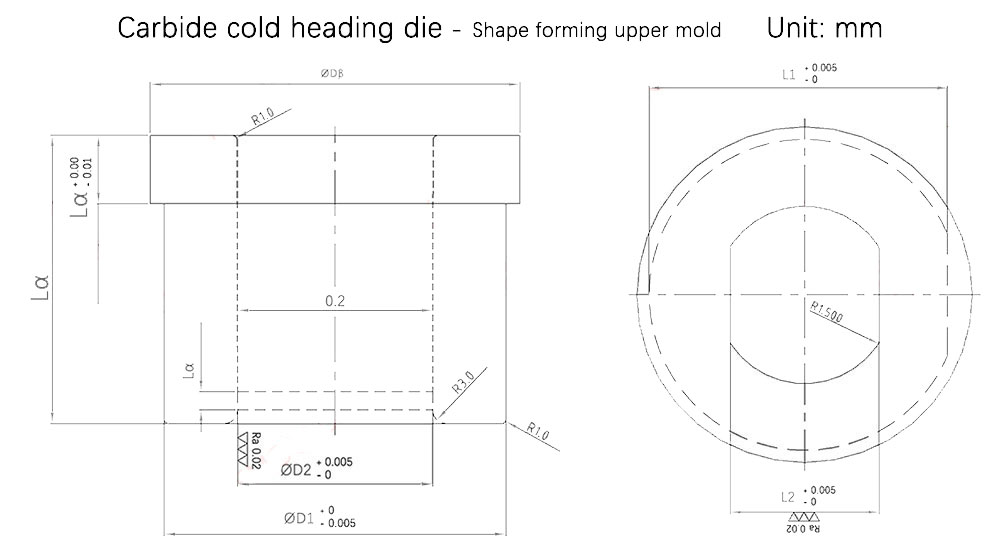
The first Carbide cold heading die case study – shape forming upper mold:
The Carbide cold heading die manufacturing process:
Large product process: cylindrical grinding – wire cutting – discharge.
- Info

The first Carbide cold heading die case study – shape forming upper mold:
Our factory business: We design, develop and produce powder metallurgy moulds, carbide parts, powder injection moulds, stamping toolings and precision mould parts. Whatsapp:+8618638951317. Email: [email protected],
The Carbide cold heading die manufacturing process:
- Large product process: cylindrical grinding – wire cutting – discharge.
- Small product process: punch machine – wire cutting – discharge.
Fabrication issues
- The higher dimensional tolerance requires positive 0.005mm on one side, and the higher finish requires Ra 0.02.
- The concentricity processing of Carbide cold heading die can reach a tolerance of ±0.002mm.
- The vertical parallelism can reach ±0.002mm.
- The mirror polishing can reach Ra0.015.
- The minimum hole processing can reach 0.06mm with a thickness of 0.6mm.

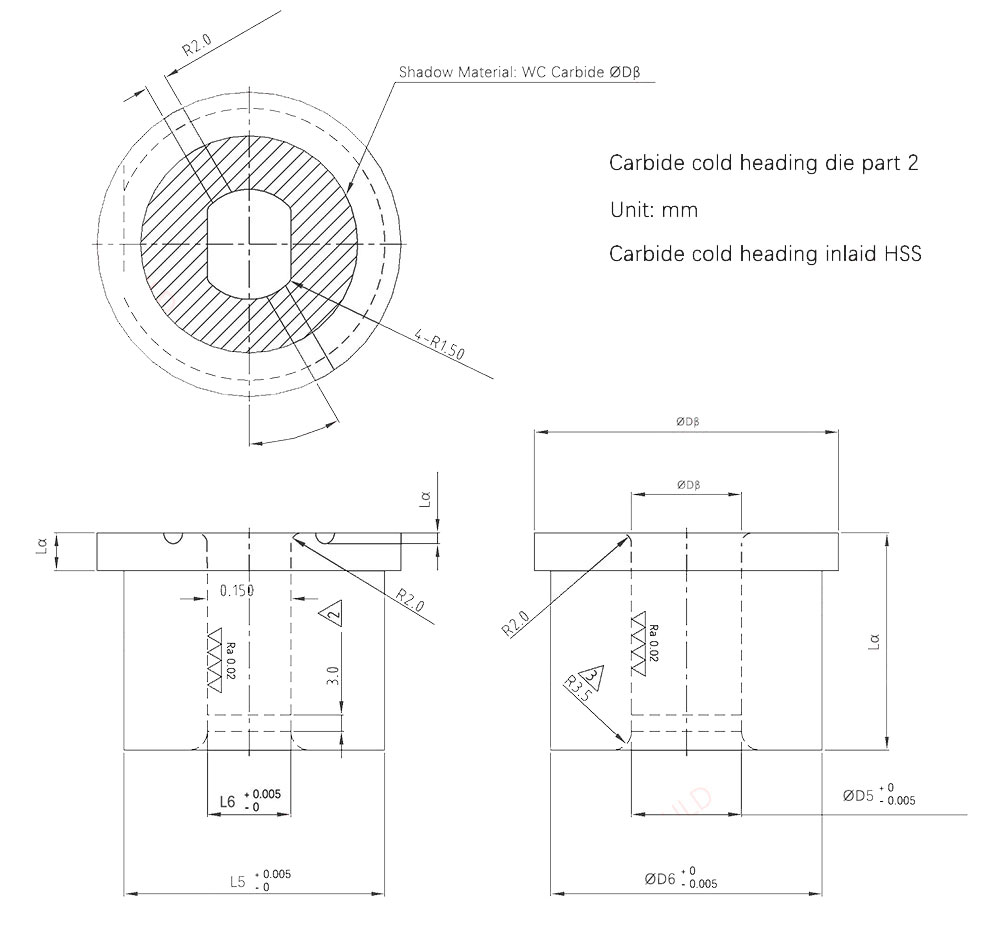
The second carbide cold heading die part study:
The manufacturing process is the same as that of the Carbide cold heading die-shape forming upper mold, the middle part of the shadow is sunken and needs to be processed by electric discharge, and the shape is irregular and the angle is complicated.

The third carbide cold heading die part study –Carbide cold heading inlaid HSS
The processed tungsten carbide part is embedded into the HSS material with high pressure by a cold heading machine.
The processing technology:
Material preparation – Hydraulic Press – External grinding – Hole wire cutting finishing – EDM – plane grinding – CNC machining (R2.0 groove).
Manufacturing difficulties:
- Ensuring that the performance and hardness of the tungsten carbide part are within the specified range after inlaying.
- Preventing cracking of the HSS part and avoiding major changes in its performance.
- Achieving high precision with a tolerance of 0.005mm.
- Achieving a finish on the tungsten carbide part with a surface roughness of Ra0.02.
To achieve these requirements, the following steps will be taken:
- Leaving a margin for inlaying to match the gap before finishing.
- Controlling the hardness of the white carbide part to ensure that it meets the required specifications.
Overall, this project requires careful attention to detail and expertise in precision machining and materials science to achieve the desired results. By following these steps and using the appropriate techniques and equipment, it is possible to produce high-quality tungsten carbide parts with the required performance and finish.
Get Mold is a professional Carbide cold heading die processing manufacturer, established in 2007, has rich experience in processing tungsten carbide parts, many experienced processing engineers, processing equipment for the whole process, and processing precision between 0.02mm – 0.002mm Tungsten carbide products.
Our experts are here to answer your questions and provide support.
Related articles:

